Saturday, 12 April 2025

How To Clean Lvp Flooring

[Collection]

The Ultimate Guide to Cleaning Luxury Vinyl Plank Flooring

Luxury Vinyl Plank (LVP) flooring combines beauty with durability, but maintaining its pristine appearance requires proper care. Many homeowners inadvertently damage their investment with improper cleaning methods. The good news? You don't need fancy products or complicated routines - just the right knowledge and consistent habits.

As Brett Miller, VP of Technical Standards at the National Wood Flooring Association, wisely notes: "The key to maintaining any floor, including LVP, is to clean up spills right away and use the right cleaning products specifically made for your type of flooring."

Daily Maintenance: The Foundation of Beautiful LVP Floors

Your LVP flooring represents a significant investment that deserves daily attention. Think of daily maintenance as preventative care that saves you time and money in the long run. A few minutes each day can preserve your floor's beauty for years:

  • Use a microfiber dust mop or vacuum with a bare floor setting daily
  • Wipe up spills immediately with a slightly damp cloth
  • Pay extra attention to high-traffic areas where dirt accumulates
  • Use entrance mats to capture dirt before it reaches your floors

The Do's: LVP Cleaning Best Practices

Proper cleaning techniques preserve both the appearance and protective wear layer of your LVP flooring. Follow these practices to maintain your floor's vibrant look:

Practice Method Benefit
Regular Sweeping Soft-bristled broom or vacuum with bare floor setting Prevents scratching from grit and debris
Damp Mopping Well-wrung microfiber mop with pH-neutral cleaner Removes stuck-on dirt without excessive moisture
Spot Treatment Isopropyl alcohol on white cloth for stubborn stains Tackles tough stains without damaging finish
Preventive Care Furniture pads and entrance mats Minimizes scratches and reduces dirt tracking

The Don'ts: What to Avoid with LVP Flooring

Using incorrect cleaning methods can cause permanent damage to your LVP investment. The protective wear layer that gives your floor its durability and attractive appearance is vulnerable to certain products and techniques:

  • Avoid soap-based cleaners - They leave residue that creates a dull, cloudy appearance
  • Skip vinegar solutions - Despite popular belief, vinegar's acidity can break down protective coatings over time
  • Ditch abrasive tools - Steel wool, scrub brushes, and rough sponges create micro-scratches
  • Eliminate excess water - Standing water can seep between planks, causing edge swelling and adhesive failure
  • Never use bleach or ammonia - These harsh chemicals strip protective coatings and cause irreversible damage
  • Be cautious with steam mops - Unless specifically approved by your flooring manufacturer, high heat and moisture can cause warping

Step-by-Step LVP Cleaning Guide

Follow this systematic approach to clean your LVP flooring effectively:

  1. Remove loose debris with a soft-bristled broom or vacuum with hard floor setting
  2. Prepare a cleaning solution using a pH-neutral cleaner specifically formulated for vinyl flooring
  3. Dampen a microfiber mop with the solution, ensuring it's not overly wet (excess moisture is the enemy!)
  4. Clean in sections, working from one end of the room to the other
  5. For stubborn spots, apply gentle pressure with a damp cloth
  6. Allow the floor to air dry completely before walking on it
  7. For deep cleaning (monthly), consider manufacturer-approved products designed specifically for LVP

Tackling Stubborn Stains

Even with regular maintenance, stubborn stains can occur. Here's how to handle common culprits:

  • Scuff marks: Gently rub with a tennis ball or clean eraser
  • Chewing gum: Harden with ice, then carefully scrape with a plastic scraper
  • Ink/permanent marker: Dab (don't rub) with isopropyl alcohol on a white cloth
  • Grease: Apply a small amount of dish soap on a damp cloth, then rinse thoroughly

Final Thoughts

Maintaining your LVP flooring doesn't require complicated routines or expensive products—just consistent care and the right techniques. By implementing these simple practices, you'll protect your investment while enjoying beautiful floors for years to come.

Remember that prevention is the best strategy: regular sweeping, prompt attention to spills, proper furniture protection, and entrance mats will drastically reduce the need for intensive cleaning. Make these habits part of your regular home maintenance routine, and your LVP floors will continue enhancing your living space for many years.

For more detailed information about LVP flooring care and maintenance, visit Clean Restore Connect, where you'll find additional resources and expert advice.
Thursday, 10 April 2025

Vegetable Biryani

[Collection]

The Art of Vegetable Biryani: An Aromatic Symphony of Flavors

Gather 'round, food enthusiasts! Today we're exploring the captivating world of vegetable biryani – a colorful, aromatic symphony of flavors that has conquered hearts globally. This isn't just another rice dish; it's a beautiful marriage of aged basmati rice and fresh vegetables, transformed through time-honored techniques and spice secrets that will fill your kitchen with the enticing aromas of Indian cuisine.

Whether you're a seasoned cook or just beginning your culinary journey, vegetable biryani offers the perfect balance of comfort and elegance. Let's unveil this art together, one fragrant layer at a time!

The Soul of Biryani: Perfect Ingredients

A traditional vegetable biryani relies on three fundamental components: aged basmati rice for the fragrant base, carefully selected whole spices for aromatic depth, and fresh vegetables cut precisely for even cooking. The rice, preferably aged for at least 6 months, must be soaked before cooking to ensure proper grain separation.

Ingredient Quantity Notes
Basmati Rice 2 cups Aged minimum 6 months
Cardamom 4 pods Green variety
Cloves 6 pieces Whole
Cinnamon 1 inch stick
Bay Leaves 2 pieces
Mixed Vegetables 3 cups Carrots, beans, peas, cauliflower, potatoes
Yogurt 1/2 cup For moisture and tanginess
Ginger-Garlic Paste 2 tbsp
Green Chilies 2-3 Adjust to heat preference

The Biryani Magic: Mastering the Method

A fragrant and flavorful vegetable biryani combines aromatic basmati rice with seasonal vegetables through precise techniques. The layering approach and pressure cooking method ensure perfectly cooked rice while vegetables maintain their texture and nutritional value.

  1. Rice Preparation: Soak basmati rice for 30 minutes, then drain thoroughly.
  2. Spice Infusion: Heat oil or ghee in a pressure cooker, adding whole spices to release their essential oils.
  3. Flavor Base: Sauté onions until golden, then add ginger-garlic paste, green chilies, and tomatoes.
  4. Vegetable Integration: Add uniformly cut vegetables and spices, cooking for 2-3 minutes.
  5. The Layering Technique: Spread the drained rice over the vegetables without mixing.
  6. Perfect Hydration: Add water and yogurt in the correct proportion (1:1.5 rice to water ratio).
  7. Dum Cooking: Close the pressure cooker and cook for one whistle on high heat, then immediately release pressure manually.
  8. Resting Period: Let the biryani rest for 5 minutes before gently fluffing the rice.

Chef's Secrets: Elevating Your Biryani

To create perfect vegetable biryani, mastering these essential cooking techniques will elevate your dish from good to exceptional:

  • Perfect Soaking: 30 minutes for the rice – no more, no less – ensures separated grains.
  • Uniform Cutting: Vegetables should be cut to specific sizes for even cooking while maintaining their integrity.
  • Layering Discipline: Always layer rice on top of vegetables rather than mixing initially.
  • Authentic Sealing: For traditional dum cooking, seal your pot with dough or foil to trap aromatic steam.
  • Spice Marination: Allow vegetables to briefly marinate in aromatic spices before layering.
  • Saffron Luxury: For special occasions, drizzle each layer with saffron-infused milk and ghee.

The Rich History: Beyond the Recipe

While many assume biryani must contain meat, vegetable biryani's fascinating history reveals a rich tapestry of cultural fusion and innovation. It traces back to the Nizams' courts, where Hindu bookkeepers working under Muslim rulers needed meat-free options.

Creative court chefs developed vegetarian versions using aromatic spices like cumin, cardamom, and turmeric. The slow-cooking process "dum" ensures flavors meld perfectly as rice and vegetables cook under pressure.

Biryani's journey weaves through Persian kitchens and coastal ports, absorbing flavors and techniques from diverse culinary traditions.

Through famines and food shortages, communities adapted by incorporating local ingredients like potatoes in Bengal, proving biryani's remarkable ability to transform while maintaining its essence.

Nutritional Balance: Mindful Enjoyment

Understanding vegetable biryani's nutritional profile helps us make informed decisions about this beloved dish. Rich in vitamins A and C from its vegetable medley, it provides important nutrients for maintaining overall health.

For a more balanced meal, consider these adaptations:

  • Try brown rice or quinoa for added fiber and nutrients
  • Increase the vegetable-to-rice ratio for more nutrients
  • Balance the carb-heavy nature with protein-rich sides like dal
  • Experiment with yogurt-based preparations for authentic taste with added health benefits

Whether you're recreating a traditional recipe or crafting your modern interpretation, vegetable biryani offers a canvas for creativity while honoring centuries of culinary wisdom. Each aromatic pot tells a story with every fragrant bite!

Tuesday, 8 April 2025

Aloo Gobi (Potato and Cauliflower Curry)

[Collection]

Aloo Gobi: The Soul-Warming Potato & Cauliflower Curry

There's a particular magic that happens when potatoes and cauliflower meet in a pan with aromatic Indian spices. As a chef who has prepared countless curries, I can tell you that Aloo Gobi represents comfort food at its finest – humble ingredients transformed into a dish that's greater than the sum of its parts.

What makes this curry special isn't fancy techniques or rare ingredients – it's the perfect harmony of earthy turmeric, warming garam masala, and the contrasting textures of tender potatoes against slightly firm cauliflower. Whether you're a novice cook or seasoned home chef, this approachable dish delivers impressive flavor while maintaining its rustic charm.

The Symphony of Ingredients

Every great dish begins with quality ingredients. For Aloo Gobi, we're focusing on two stars – potatoes and cauliflower – elevated by a supporting cast of aromatics and spices. The beauty lies in how these common vegetables absorb the complex spice blend, creating layers of flavor that develop with each bite.

Key Ingredients Quantity Chef's Notes
Cauliflower 1 medium head, cut into florets Look for tight, cream-colored heads without brown spots
Potatoes 3 medium, cubed Yukon Gold offer the perfect texture
Onion 1 large, finely chopped The foundation of flavor
Tomatoes 2 medium, chopped Provides tang and body
Ginger-garlic paste 2 tablespoons The aromatic foundation
Cumin seeds 1 teaspoon Whole seeds add texture and flavor pops
Turmeric powder 1 teaspoon Provides color and earthy notes
Garam masala 1 teaspoon Add at the end for aromatic finish
Cooking oil 3 tablespoons Neutral oil with high smoke point works best
Fresh coriander For garnish Brightens the entire dish

Crafting the Perfect Curry

Creating a memorable Aloo Gobi is all about technique and timing. Follow these steps to achieve the perfect balance of textures and flavors:

  1. Prep with purpose: Cut potatoes into 1-inch cubes and cauliflower into slightly larger florets – this ensures even cooking despite different densities.
  2. Layer the flavors: Begin by tempering cumin seeds in hot oil until they sizzle and become aromatic.
  3. Build the base: Add onions and sauté until golden brown (about 5-7 minutes) – patience here builds foundation flavor.
  4. Awaken the aromatics: Add ginger-garlic paste and cook until the raw smell disappears (about 1-2 minutes).
  5. Introduce tomatoes and spices: Add chopped tomatoes along with turmeric, chili powder, and coriander powder. Cook until oil begins to separate from the masala.
  6. Add vegetables strategically: Incorporate parboiled potatoes first, then cauliflower, coating everything in the spice mixture.
  7. Perfect the simmer: Cover and cook on low heat for 15-20 minutes, checking occasionally to prevent sticking.
  8. Finish with flair: Sprinkle garam masala, mix gently, and garnish with fresh coriander leaves.

Chef's Secrets: Elevating Your Aloo Gobi

After years in professional kitchens, I've collected these game-changing tips that transform good Aloo Gobi into great Aloo Gobi:

  • Soak potatoes in cold water for 20 minutes before cooking to remove excess starch and prevent them from becoming mushy.
  • Parboil potatoes to the halfway point before adding them to the curry – this ensures perfect tenderness without disintegration.
  • Control moisture carefully – Aloo Gobi should be relatively dry, not swimming in sauce. Let vegetables release their natural moisture before adding any water.
  • Season in layers rather than all at once – this builds complex flavor notes impossible to achieve with one-time seasoning.
  • Add kasuri methi (dried fenugreek leaves) in the final minutes of cooking for that authentic restaurant-quality aroma.
  • Rest the dish for 5-10 minutes before serving to allow flavors to harmonize.

A Tale of Two Vegetables

While Aloo Gobi feels timeless, it's actually a relatively modern creation in Indian cuisine's long history. The Portuguese introduced potatoes to India in the 17th century, while cauliflower arrived with British colonial influence in the 1820s. What makes this dish remarkable is how Indian cooks brilliantly incorporated these foreign vegetables into their ancient culinary traditions, creating something that now feels quintessentially Indian.

Region Aloo Gobi Variation Distinctive Feature
Punjabi Dhaba-style Rich tomato base, generous oil, hearty texture
Bengali Panch phoron Aloo Gobi Uses five-spice tempering, lighter preparation
South Indian Aloo Gobi Poriyal Includes curry leaves, mustard seeds, coconut

Beyond the Basic Recipe

The versatility of Aloo Gobi extends beyond its traditional preparation. For a healthier version, try air frying or steaming the vegetables before adding them to your spice base. At approximately 208 calories per serving, this dish offers substantial nutritional benefits, providing fiber, vitamins, and antioxidants.

Aloo Gobi exemplifies why Indian cuisine continues to captivate food lovers worldwide. It demonstrates how masterful spicing can transform simple ingredients into something extraordinary, proving that the most memorable dishes often come from humble beginnings. Whether served with roti, naan, or rice, this curry offers a perfect balance of comfort and complexity that makes it a standout in the vast landscape of Indian cuisine.

The next time you're looking for a dish that delivers big flavor without demanding professional skills, remember this Aloo Gobi recipe. It's a testament to the beautiful alchemy that happens when quality ingredients meet time-honored techniques – the very essence of what makes cooking such a joy.

Monday, 7 April 2025

Chana Masala (Chickpea Curry)

[Collection]

Mastering Chana Masala: The Ultimate Chickpea Curry Guide

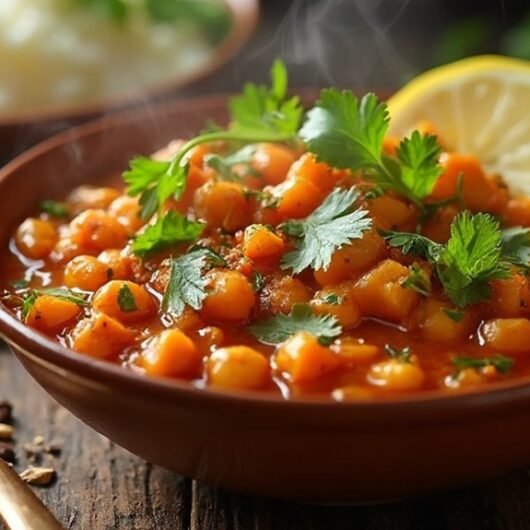
Delicious Chickpea Curry

In my decades of culinary exploration, few dishes have captured my heart quite like Chana Masala. This North Indian chickpea curry is the perfect marriage of simplicity and complex flavor—a dish that delivers restaurant-quality satisfaction with relatively minimal effort. Each spoonful offers tender chickpeas swimming in a richly spiced tomato gravy that's simultaneously tangy, spicy, and deeply comforting.

What I love most about this dish is its remarkable versatility. Whether you're cooking for a weeknight family dinner, meal prepping for busy days ahead, or impressing guests at a dinner party, Chana Masala rises to every occasion. The humble chickpea transforms into something truly magical when given the right treatment with aromatics and spices.

The Essential Ingredients

The beauty of Chana Masala lies in its harmonious balance of pantry staples and aromatic spices. While the ingredient list might seem extensive at first glance, most items are kitchen standards that create extraordinary flavor when combined properly.

Main Components Quantity Chef's Notes
Chickpeas (Chole) 1 cup dried or 2 cans (15 oz each) Dried provide better texture but require overnight soaking
Onions 2 medium, finely chopped Golden caramelization is crucial for depth of flavor
Tomatoes 3 medium, chopped Roma or vine-ripened offer best flavor
Ginger-Garlic Paste 2 tablespoons Freshly made delivers superior aromatic quality
Oil or Ghee 3 tablespoons Ghee adds wonderful nutty notes

Essential Spice Blend

  • 2 tablespoons Chana Masala powder (or make your own with cumin, coriander, and garam masala)
  • 1 teaspoon cumin seeds
  • 1 teaspoon ground turmeric
  • 1 teaspoon red chili powder (adjust to taste)
  • 1 teaspoon dried fenugreek leaves (kasuri methi) - the secret ingredient!
  • Salt to taste

The Cooking Method: Building Layers of Flavor

What separates a good Chana Masala from an exceptional one is patience. This dish rewards those who understand that flavor development happens in stages. Here's my foolproof approach:

  1. Prepare your chickpeas - If using dried, soak overnight and pressure cook with a pinch of baking soda until tender. With canned, rinse thoroughly to remove excess sodium and starch.
  2. Create the aromatic base - Heat ghee or oil in a heavy-bottomed pan. Add cumin seeds and wait for them to sputter and dance. This blooming of spices in hot fat is the foundation of all great Indian cuisine.
  3. Develop depth with onions - Add finely chopped onions and a pinch of salt. The salt helps extract moisture and speeds caramelization. Cook for 10-12 minutes until they reach a gorgeous golden-brown. Patience here pays tremendous dividends in flavor.
  4. Introduce ginger and garlic - Add your paste and sauté until the raw aroma dissipates, about 2 minutes. If it starts sticking, a splash of water helps release those flavorful brown bits from the pan bottom.
  5. Build the tomato base - Add chopped tomatoes and your ground spices. Cook until tomatoes break down and oil begins to separate from the mixture, creating what we call the "masala" (5-7 minutes).
  6. Marry the components - Add your chickpeas to this aromatic base. For an authentic touch, mash about 20% of the chickpeas with the back of your spoon to naturally thicken the gravy.
  7. Simmer and harmonize - Add water to achieve desired consistency, then let everything simmer together for 15-20 minutes. This is where magic happens as flavors meld.
  8. Finish with brightness - Turn off heat, then add crushed kasuri methi, fresh lemon juice, and chopped cilantro. These final touches provide the aromatic high notes that make the dish sing.

Chef's Secret Tips

Tea Bag Trick: Adding a plain black tea bag during cooking contributes a subtle smoky depth and enhances the traditional dark color of restaurant-style Chana Masala. Remove before serving!

Texture Balance: For the perfect consistency, crush some chickpeas against the side of your pot with a wooden spoon rather than blending. This creates a naturally thickened gravy while maintaining textural interest.

Spice Sequencing: Add your spices in the right order—whole spices first, followed by ground spices after the wet ingredients. This prevents burning and bitter flavors.

Resting Period: Like many curries, Chana Masala tastes significantly better after resting. If possible, make it a day ahead and gently reheat for intensified flavor.

Cultural Heritage in a Bowl

Every spoonful of Chana Masala connects you to thousands of years of culinary tradition. Archaeological evidence shows chickpeas were cultivated in the Indus Valley Civilization as early as 3300 BCE, and they've remained a protein staple across the Indian subcontinent ever since.

The dish we recognize today evolved through centuries of cultural exchange—Persian influences from the Mughal Empire contributed aromatic spicing techniques, while Portuguese traders introduced the now-essential tomatoes and chilies in the 16th century. After India's partition in 1947, Punjabi refugees spread this beloved recipe throughout the country and eventually worldwide.

Serving Suggestions

Accompaniment Pairing Notes
Basmati Rice The aromatic long grains beautifully capture the flavorful gravy
Fresh Naan Perfect for scooping and soaking up every bit of sauce
Raita (Yogurt Side) The cooling dairy provides welcome contrast to the spices
Pickled Onions Adds bright acidity and crunchy texture

Health Benefits: Nutrition in Every Bite

Beyond its incredible flavor, Chana Masala delivers impressive nutritional value with approximately 148 calories per serving. The chickpeas provide excellent plant-based protein and fiber, while the spices offer anti-inflammatory and digestive benefits. The combination of protein, complex carbohydrates, and healthy fats creates a satisfying meal that keeps you energized for hours.

This beloved dish proves that healthy eating need not sacrifice flavor. The next time you're craving something deeply satisfying yet nutritious, remember that a pot of Chana Masala offers nourishment for both body and soul—a true culinary gift that connects us to centuries of cooking wisdom.

Discover more authentic Indian recipes and culinary insights at AskMsRecipe.com, where tradition meets modern cooking technique.